
The Advanced Message Processing System (AMPS) from 60East Technologies is a state-of-the-art technology that powers up many of the Fortune 500 companies. Developers who tried AMPS love it and use it in their products.
But is there an easy way to test features of AMPS without having access to a linux machine and installing AMPS Server? There is NOW! We introduce a new quick and convenient way to evaluate AMPS: Cloud Evaluation Dashboard. We’ll take care of the Linux server hosting let you start trying AMPS in your products right away.
Cloud Evaluation Dashboard
Once you have signed up for the Cloud Evaluation Dashboard account and gotten an email from us containing the link to your dashboard, you are just 4 steps away from being amazed by AMPS features and its blazing-fast perfomance.
Step 1: Download Client files
Our first step is the Downloads page. Here you can select and download AMPS client libraries to use in your code:
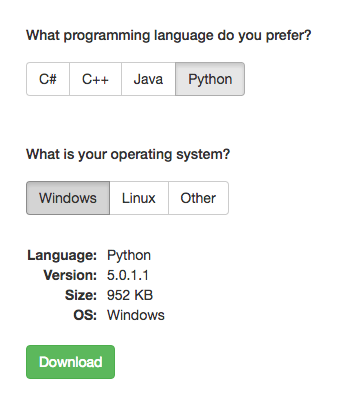
We offer evaluation kits for the AMPS client libraries for the most popular programming languages:
- C#
- Java
- C++
- Python
and operating systems:
- Windows
- Linux
Don’t see your favorite combination of language and operating system in the prebuilt evaluation kits? Visit our Developer Center for the full selection of clients!
You have your client files downloaded? Don’t worry about unzipping and setting them up yet. Let’s proceed to the next step!
Step 2: Turn ON your AMPS Instance
Your personal cloud instance of AMPS Server is waiting for you! Hit the Turn ON button and let us do all the installation and configuration of the AMPS Server for you. It can take a few minutes for the virtual machine to be provisioned and start running, so be patient. You’re almost ready to crank it up!
You can even browse the dashboard pages while it’s starting. Within a few minutes the instance will be up and running:

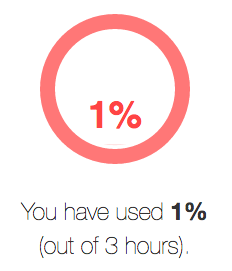
This page also serves as the control center of your cloud experience. From here you can start, stop, or reset your instance, and see different statistics about perfomance and hardware. This is your personal instance of AMPS in the cloud – this instance is not shared with others.
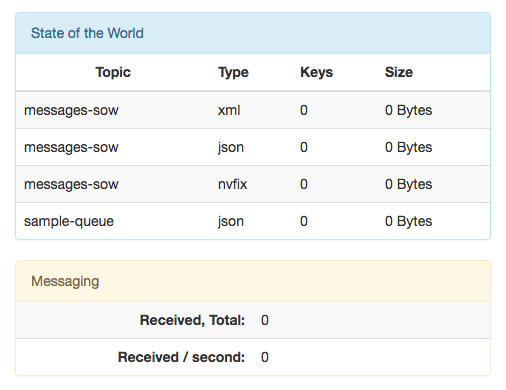
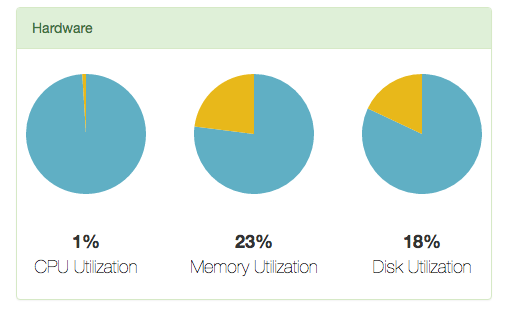
The instance is ready? Let’s move to the next step!
Step 3: Configure your Client Libraries
Once you have the AMPS Server instance up and running, you will have all the pieces required to set up the client libraries downloaded at the Step 1. Navigate to the Configure page in order to get personal instructions on how to setup AMPS client libraries according to your preferred language. The IP of your cloud instance is already in the instructions, so there’s no need to go back and forth and copy-and-paste it:
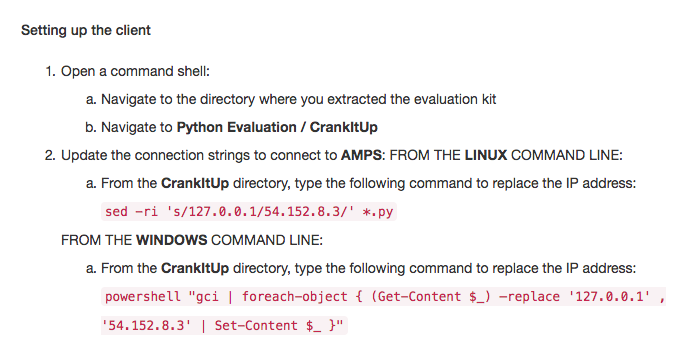
However, since the instance changes its IP address every time it starts/stops, you need to update IP address in the client settings. The Configure page will always contain up-to-date settings.

At this point you are ready to start playing with AMPS! Proceed to the next step!
Step 4: Get a Taste of AMPS features
We’ve prepared simple and clear examples of a few of the main features of AMPS:
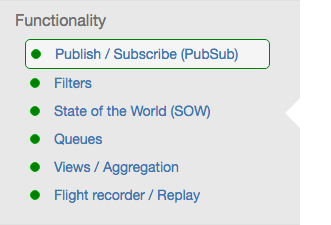
On these pages you’ll find quick introduction to a feature and code examples that are ready to be copied and pasted in the code:
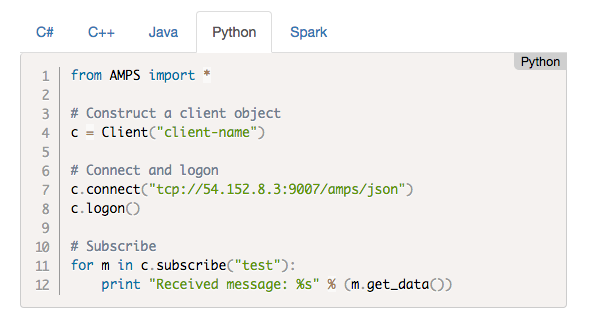
Code examples are available in all supported languages and are tailored to work with your AMPS instance and update their content automatically.
Further Steps
After you’ve gotten a sample of AMPS with the Cloud AMPS Server, the next step is to try AMPS on your own hardware.
The table below demonstrates main differences between the Cloud and the Local Evaluation modes:
| Cloud Instance | Local Instance |
Pros:
|
Pros:
|
Cons:
|
Cons:
|
Want to know more about how AMPS can help you build great applications? Still having trouble getting AMPS to play your tune? For help or questions, send us a note at [email protected].

Copyright © 2016 All rights reserved. 60East, AMPS, and Advanced Message Processing System are trademarks of 60East Technologies, Inc.